As I've been riding, I've noticed that the wind buffets the top-third of my helmet at highway speeds. Raising the windshield didn't really seem to make much of a difference, so I started looking into different aftermarket solutions. I'll save everyone the pain of reading through my thought process and just say that I decided on the MRA X-creen, which is similar to the Suzuki V-Strom Adventure Touring Screen, except the wing on the X-creen is attached with a single arm on both sides (vs. two), which allows it a greater range of motion. I got a great deal on mine after seeing it for sale on the Stromtrooper.com For Sale forum. It cost me $115 shipped, which is a great deal considering TwistedThrottle advertises it for $209.99 before shipping.
 |
| MRA X-creen (Photo from TwistedThrottle.com) |
Installation of the windshield is very simple, requiring only a 3mm allen wrench. Simply remove the four screws, remove the stock windshield, and mount the X-creen in its place. I left the X-creen in the top position where I had the stock windshield. The X-creen with the wing in the lowest position is approximately the same size as the stock screen. Raising the wing makes the X-creen quite a bit taller. I would guess approximately 2-3".
Because the X-creen does not have the built-in stand-offs like the stock screen, it sits quite a bit closer to the instrument pod and is raked further back as well. It's more like the screen was on my old Ninja 650R. You can see the direct comparison in the pictures below. It looks like the Suzuki Touring Screen may be designed to provide a positioning similar to the stand-offs. I would have liked to try it, but they want almost $300 for it!
NOTE: Please be sure to read my update on the X-creen installation here.
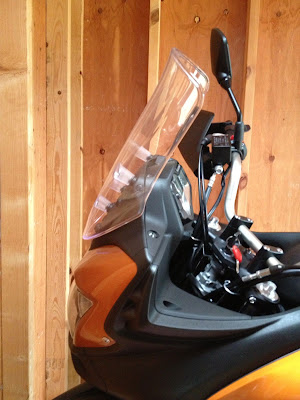 |
| Stock Screen Profile View |
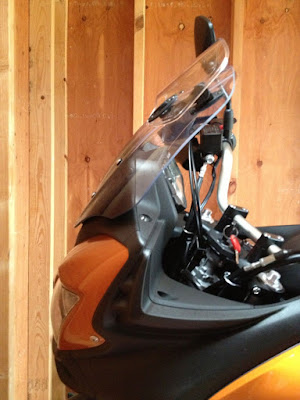 |
| MRA X-creen Profile View |
Seeing as how I do not own or have access to a wind tunnel, I had to take the bike out and make a lot of runs up and down the freeway frontage road to make my adjustments to the wing. I started out in the position you see above, but I got as much if not more wind blast to the helmet. I then tried adjusting the wing angle, but it didn't do enough. So I then flipped the arm into the upright position so that the wing was in the highest position. When the arm is upright, you cannot adjust the wing to be more vertical, only more horizontal, so I ended up adjusting the arm to get the wing more vertical to move the airflow higher.
 |
| Final Arm/Wing Position |
After several stops and adjustments, I think I've found a good setting that gets most of the turbulent air to go over my helmet. The arm is pretty much vertical, and the wing is rotated back about 20 degrees. Just for reference, I am 6'-0" with a 32" inseam, and I'm riding on the stock height seat.
I no longer feel like someone's pushing to top of my helmet side to side, but it's not like I'm riding inside my car, either. I will still be wearing ear plugs to dampen the wind noise. I'm sure more adjustment will be required, because there was a good 10-15 mph wind yesterday. Unfortunately, the forecast is pretty much crappy for the next few days, so it will probably be a while before I can get out for an extended ride to see how well this screen does long-term. Until then, I think it's a keeper.
UPDATE: Please be sure to read my
follow-up posting on the X-creen and my posting on
replacing the wing/spoiler.


