Just a quick update here. I had a chance to take the bike out for a couple of hours today and play with a number of different positions for the wing on the X-creen. I had originally been riding with the support arms pretty much straight up 12 o'clock with the top of the wing angled slightly backward since this is how it appeared in the pics from MRA. This worked pretty well, and after installing the spacers, it even seemed to work better. After several starts and stops to test various positions, I've now settled on having the support arms positioned so they are pointing directly forward with the top of the wing angle back so it's almost, but not quite, parallel to the primary shield. It's probably about two clicks away from being parallel. Sorry, I didn't take any pictures, since it was a trial-and-error process. If you want a picture of the final position, leave a comment, and I'll go take one and add it to this post.
It was fairly windy today, with the winds blowing out of the south, so I was able to test the position with and without a headwind as well as with crosswinds. This new position seems to push the air high enough that the air intakes on the top of my Shoei RF-1000 can catch it, but it leaves the helmet itself alone. I'm not sure, but I think this works better than the original position due to the wing being further forward.
I have also come to the conclusion that the primary source of any buffeting is now the mirrors. Installing the mirror extenders helped tremendously, so I may experiment with angling the mirror stalks in a little more to see if that helps. I also considered buying some Saeng Micro-Swirl Generating Edging and putting it on the front of the mirrors to see if that helps. Then again, the temperatures are quickly ratcheting up into the 90s, so it's probably worth it to have a bit of wind for evaporative cooling.
UPDATE: At the request of Mark Collins, I took a picture of my current wing position setting for your reference. As you can see, the support arm is pointing directly forward, almost parallel to the ground. The wing is angled at about 45 degrees from the arm, which gives it a little upward angle relative to the primary shield. In case you missed it in the original X-Creen post, I'm 6'-0" with a 32" inseam, so your mileage may vary with this setup.
Showing posts with label wind shield. Show all posts
Friday, May 31, 2013
Friday, May 17, 2013
MRA X-creen Re-mount or "Oops, need to RTFM!"
So here's a bit of a lesson in RTFM. That would be Read The Farkle's Manual in this case. Now in my defense, I didn't read it, because I didn't know about it. If you read my original post, you'll know that I bought this screen second-hand from a fellow Stromtrooper. When I opened the package, all I saw was the windshield itself, so I figured it was just a direct replacement, using the stock screen's screws to mount it. Apparently that is not the case. As I was throwing out boxes that have accumulated, I was separating out the packing material that could not be recycled, and lo and behold, there was a plastic ziplock bag at the bottom of the box with... you guessed it... the installation sheet and some parts!
The parts baggy included two 15mm plastic spacers, two 10mm plastic spacers, washers, and longer screws with which to mount the windshield. Interestingly enough, I was contemplating going to the hardware store to look for these very items to see if that would help move the wind off the top third of my helmet. I installed the parts today before I went for a ride, which took all of 15 minutes. The key to installation is to put the washer on the screw, then insert the screw through the front of the windshield. On the back side of the windshield, put the spacer on the screw, and then put the well nut on the screw and turn it 2-3 times to keep it from falling off, but not far enough to compress the rubber. The two long screws go with the 15mm spacers in the top holes. The short screws go with the 10 mm spacers in the bottom holes. Once all four screws and spacers are installed, it's a simple matter of pushing the well nuts into the holes in the fairing and tightening them down with the included allen wrench (3mm).
I was very surprised at how much of a difference it made. I can still hear some wind roar with my ear plugs, but I don't really think that's going to ever go away, but the main thing is that there is minimal turbulence hitting my head now. I had been considering trying out a Parabellum windshield, but I don't think that's necessary any more. The main reason I know it's made a difference is because there is quite a bit less wind noise being picked up by my helmet-mounted Drift HD.
I still need to play around with the angle of the spoiler, though. I angled it back two clicks from the straight up position, and it seems to have improved things a little bit. I'm going to rotate it forward one click to see how that changes things, or perhaps rotate the arm forward to move it down and out front a bit more to see what that does. Overall, the proper mounting pieces have improved this windshield, and I thought it was pretty good to begin with.
The mounting parts are essential for proper fit. |
Back side of the windshield with all screws, spacers, and well nuts fitted. |
I still need to play around with the angle of the spoiler, though. I angled it back two clicks from the straight up position, and it seems to have improved things a little bit. I'm going to rotate it forward one click to see how that changes things, or perhaps rotate the arm forward to move it down and out front a bit more to see what that does. Overall, the proper mounting pieces have improved this windshield, and I thought it was pretty good to begin with.
Labels:
2012,
accessories,
DL650,
DL650A,
Glee,
MRA,
stromtrooper,
stromtrooper.com,
Suzuki,
V-Strom,
VStrom,
wind shield,
windshield,
X-creen
Friday, January 4, 2013
MRA X-creen
As I've been riding, I've noticed that the wind buffets the top-third of my helmet at highway speeds. Raising the windshield didn't really seem to make much of a difference, so I started looking into different aftermarket solutions. I'll save everyone the pain of reading through my thought process and just say that I decided on the MRA X-creen, which is similar to the Suzuki V-Strom Adventure Touring Screen, except the wing on the X-creen is attached with a single arm on both sides (vs. two), which allows it a greater range of motion. I got a great deal on mine after seeing it for sale on the Stromtrooper.com For Sale forum. It cost me $115 shipped, which is a great deal considering TwistedThrottle advertises it for $209.99 before shipping.
Installation of the windshield is very simple, requiring only a 3mm allen wrench. Simply remove the four screws, remove the stock windshield, and mount the X-creen in its place. I left the X-creen in the top position where I had the stock windshield. The X-creen with the wing in the lowest position is approximately the same size as the stock screen. Raising the wing makes the X-creen quite a bit taller. I would guess approximately 2-3".
Because the X-creen does not have the built-in stand-offs like the stock screen, it sits quite a bit closer to the instrument pod and is raked further back as well. It's more like the screen was on my old Ninja 650R. You can see the direct comparison in the pictures below. It looks like the Suzuki Touring Screen may be designed to provide a positioning similar to the stand-offs. I would have liked to try it, but they want almost $300 for it!
NOTE: Please be sure to read my update on the X-creen installation here.
Seeing as how I do not own or have access to a wind tunnel, I had to take the bike out and make a lot of runs up and down the freeway frontage road to make my adjustments to the wing. I started out in the position you see above, but I got as much if not more wind blast to the helmet. I then tried adjusting the wing angle, but it didn't do enough. So I then flipped the arm into the upright position so that the wing was in the highest position. When the arm is upright, you cannot adjust the wing to be more vertical, only more horizontal, so I ended up adjusting the arm to get the wing more vertical to move the airflow higher.
After several stops and adjustments, I think I've found a good setting that gets most of the turbulent air to go over my helmet. The arm is pretty much vertical, and the wing is rotated back about 20 degrees. Just for reference, I am 6'-0" with a 32" inseam, and I'm riding on the stock height seat.
![]() |
MRA X-creen (Photo from TwistedThrottle.com) |
Because the X-creen does not have the built-in stand-offs like the stock screen, it sits quite a bit closer to the instrument pod and is raked further back as well. It's more like the screen was on my old Ninja 650R. You can see the direct comparison in the pictures below. It looks like the Suzuki Touring Screen may be designed to provide a positioning similar to the stand-offs. I would have liked to try it, but they want almost $300 for it!
NOTE: Please be sure to read my update on the X-creen installation here.
![]() |
Stock Screen Profile View |
![]() |
MRA X-creen Profile View |
![]() |
Final Arm/Wing Position |
I no longer feel like someone's pushing to top of my helmet side to side, but it's not like I'm riding inside my car, either. I will still be wearing ear plugs to dampen the wind noise. I'm sure more adjustment will be required, because there was a good 10-15 mph wind yesterday. Unfortunately, the forecast is pretty much crappy for the next few days, so it will probably be a while before I can get out for an extended ride to see how well this screen does long-term. Until then, I think it's a keeper.
UPDATE: Please be sure to read my follow-up posting on the X-creen and my posting on replacing the wing/spoiler.
Labels:
2012,
accessories,
DL650,
DL650A,
Glee,
MRA,
stromtrooper,
stromtrooper.com,
Suzuki,
V-Strom,
VStrom,
wind shield,
windshield,
X-creen
Friday, December 14, 2012
Riding and Service
So two weekends ago, I took the bike out to give it a good run now that I'm no longer limited to 5,000 rpm. The motor continues to be very smooth compared to the Ninja 650R's parallel twin. It seems to pull a little harder, too, but that may also be due to being able to rev past 5,000 when accelerating from a stop. The transmission seems to be a little stiffer, requiring a little more "deliberate" action when upshifting. The Ninja 650R's transmission edges the V-Strom here as it was very easy to upshift, sometimes not even needing the slight tug I gave to the clutch lever.
Taking advantage of the new rev freedom, I decided to blast down the interstate towards my riding location of choice, which is about 30 miles away. It's nice to be able to keep up with traffic instead of concentrating on not being run down from behind. Keeping up also meant maintaining higher revs. As a result, the indicated mileage suffered accordingly, dropping from 59.2 mpg (US) to 47.2 mpg. Interestingly enough, my mind has already accepted the upper 50's as the norm and was somewhat disappointed with the resulting 47.2 mpg despite the fact that the Ninja 650R averaged only just above that in highway riding. Part of the decreased mileage might also be due to the fact that for a good portion of the ride, there was a significant headwind. I also can't help but think that the Givi topcase might also be adversely affecting the mileage.
So speaking of headwind -- I'm not quite sure at this point that raising the windshield had the desired effect I initially thought it had. When headed into the wind, I could feel some wind buffeting on the top 1/4 of my helmet. At times, it was bad enough that my vision was somewhat buzzy, which was only exacerbated by the fact that I wear glasses. I can duck my head a couple of inches, and all wind buffeting goes away, but this isn't a comfortable way to ride. I've been eyeballing the MRA X-screen, but Twisted Throttle wants just over $200 for it, so I've been hesitant in pulling the trigger. That is until I saw a listing on the Stromtrooper.com For Sale board for just that very windscreen for $115. So we'll see if that fixes the buffeting problem when I get it. I think there's a good chance it will, because it has the little spoiler/wing at the top that can be adjusted to redirect the air flow off the top of the screen further over my helmet. Hopefully, the side-to-side buffeting isn't a result of the redirected air flow from the hand guards in combination with the paddle-like rearview mirrors.
This highway ride brought the total mileage to 640, which meant that it was time for the V-Strom's first service. Now I know there are many of you out there who believe in doing your own wrenching, but I'm a firm believer that it's money well-spent to have someone with the proper tools and greater experience do work that I could just as easily screw up with greater consequences. So I called around and was quite surprised at the wide variance in prices quoted for the initial 600 mile service. I'm not going to go into the price, because that's just going to lead to comments like "you got ripped off" or "you need to learn to do this yourself". Suffice it to say that I was happy with the job the service guys did and the price wasn't too bad even with the upgrade to Amsoil synthetic. It took less than two hours for them to get to it and complete the service, so my bike was ready and waiting by the time my buddy Erik had come to get me for lunch and dropped me off afterwards.
Hopefully tomorrow will be nice and sunny, so I can enjoy another winter's day ride.
Tuesday, November 20, 2012
Installing the OEM Hand Guards and Raising the Windscreen
The next items up are the Suzuki OEM hand guards, which also came from www.oneidasuzuki.com. While not as robust as the Barkbusters, they're also not as expensive and serve my intended purpose, which is primarily to keep small road debris off my hands as well as the cold winter winds when it actually gets cold here in Texas. Having installed the OEM under cowling already, I've come to the conclusion that Suzuki's accessory installation instructions are actually quite good. They even include mentioning the one thing of note when installing the OEM hand guards is this: 
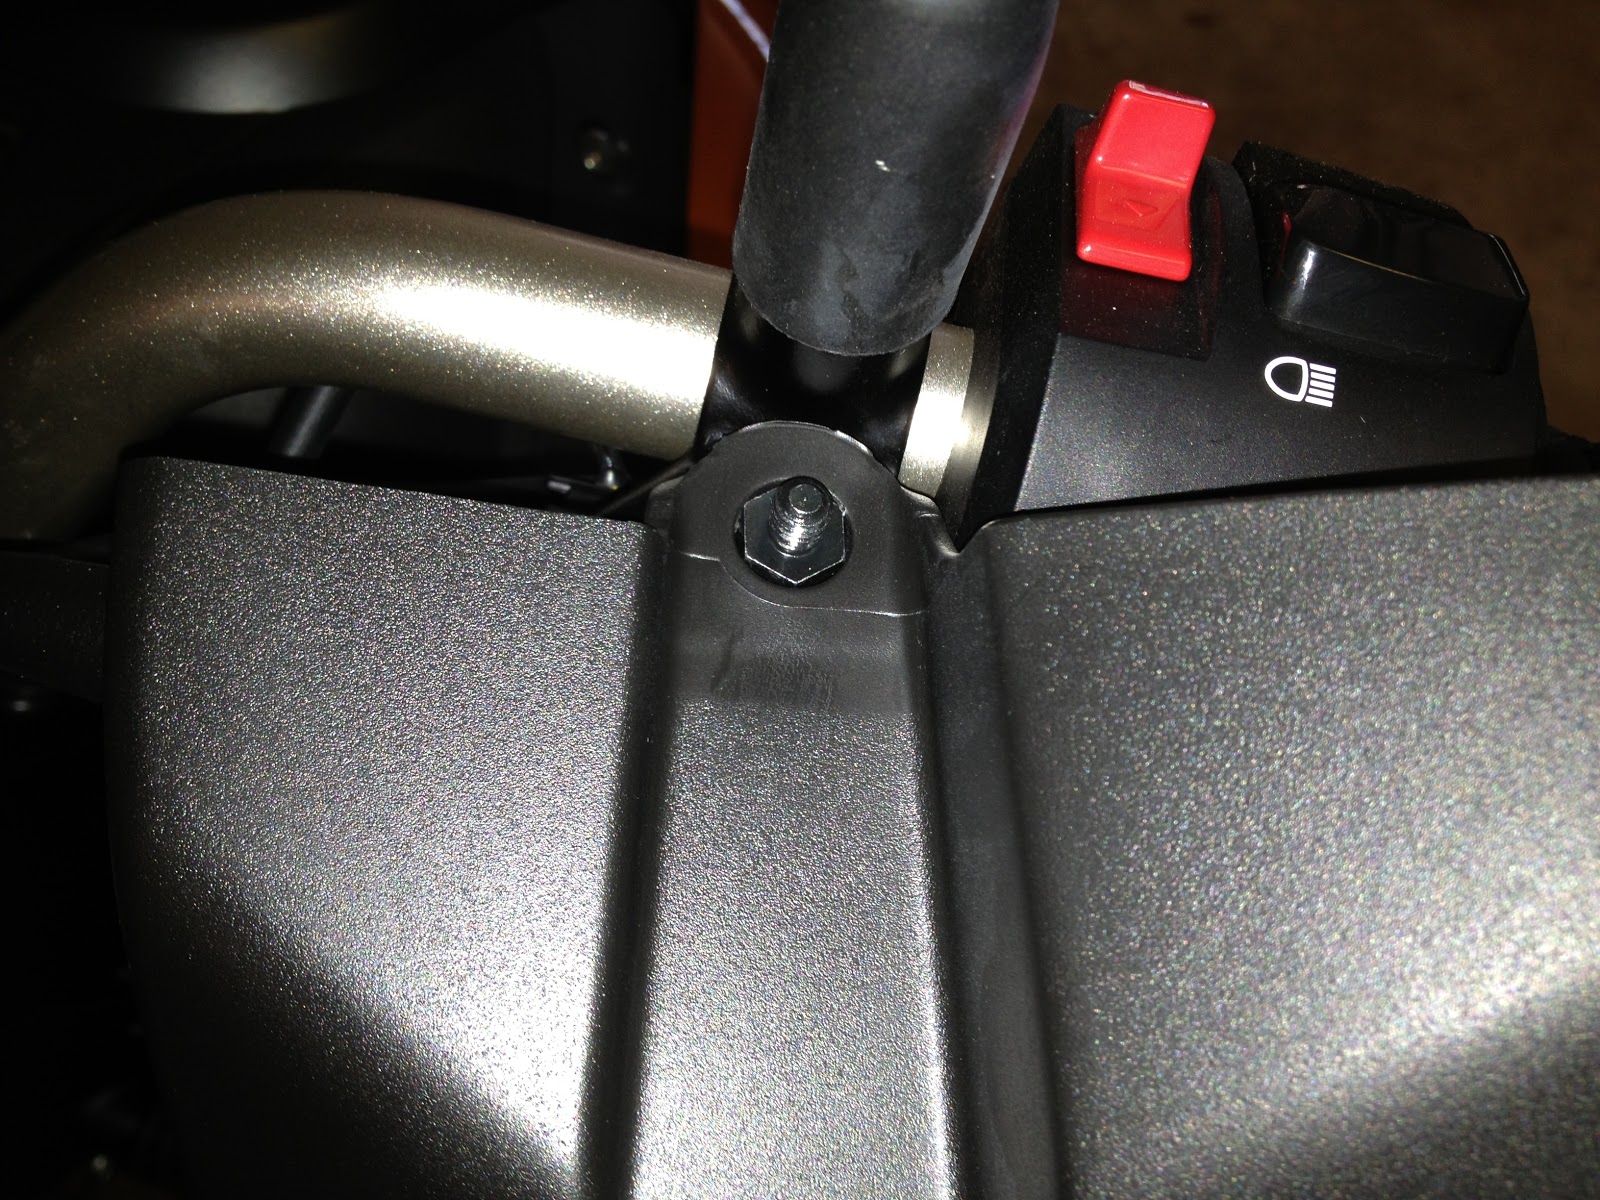
Loosen the screw holding the bar end weight, but do not remove the screw completely. You only need to loosen the screw enough so that you can pull the whole bar end weight assembly from the handlebar. If you do remove the screw all the way, it is quite likely that you will push the nut further into the handlebar, making it very difficult to remove. I actually learned this lesson the hard way when I was helping a friend install these on his '09 V-Strom.
Tools Used:
With the pivot pin removed, it's a simple matter of rotating it so that the clutch cable comes out of the groove in the end of the lever, freeing the cable stop.
![]() |
Bar End Weight Assembly Removed |
- Phillips Head Screw Driver
- 10mm socket
- Adjustable Wrench
Time to Install: ~1 hour
Starting with the left (clutch) side, I removed the clutch lever pivot pin by first removing the nut and then unscrewing the pivot pin. From what I can tell, the nut on the bottom primarily serves to lock the pivot pin in place, but should the nut come off for whatever reason, the pivot pin would not simply pull free. The stock pivot pin will not be re-used.
![]() |
Clutch Pivot Pin Nut |
![]() |
End of the Clutch Lever where the cable inserts. |
The next step is to remove the cable from the lever mount and tension adjuster. I removed the tension adjuster completely by unscrewing it from the lever mount, but as it turns out, this was not necessary. All you really need to do is line up the slots to pull the cable free, and then pull the cable housing from the end of the adjuster screw. By not removing the adjuster, you won't have to re-adjust the tension on the clutch cable when you re-assemble everything.
With the clutch cable free, remove the stock boot and replace it with the boot included with the Hand Guards. The stock boot will not be re-used.
Using the replacement clutch-side pivot pin, re-assemble the clutch lever. (Be sure you press in the sensor switch before you try inserting the clutch lever, or it will not go in. This is the safety switch that will prevent you from starting the engine unless the clutch lever is pulled in.) The replacement pivot pin will screw in just like the stock pivot pin. The washer and spacer go on the bottom side of the lever. Re-use the stock nut. There isn't any need to use Locktite as the nut has an e-clip to prevent it from backing off.
With the replacement pivot pin in place, it is time to install the clutch-side hand guard. Before doing so, you need to remove the bar end weight assembly as described above. Loosen the screw about 4 turns, just enough to ease the pressure on the compression nut. Then work it side-to-side while pulling on the weight until it pops out. It took a good amount of pulling before mine came out. Now disassemble the bar end weight assembly completely, and re-assemble it using the included screw, which is much shorter than the stock screw. Insert the screw into the bar end weight, then slide on the included spacer with the smaller diameter end towards the weight, then the stock washer and finally the stock compression nut. The stock screw and aluminum sleeve spacer will not be re-used. Insert the newly re-assembled bar end weight assembly into the handlebar but do not tighten yet.
Take the left (clutch) side hand guard, and mount it on the pivot pin. There's a hole in the top that goes over the top of the pivot pin, and a slot that will go around the bottom of the pivot pin.
Secure the top of the hand guard using the included washer and cap nut. The outside of the hand guard will snap into place in the groove provided by the smaller end of the spacer. With the end of the hand guard snapped into place, tighten the bar end weight assembly screw to tighten the compression nut, holding the assembly in the handle bar.
Finally, secure the bottom of the hand guard to the pivot pin using the supplied washer and nut. Again, this nut has an e-clip in it to prevent it from back off by itself.
Installing the right (brake) side hand guard is essentially the same process, so I won't go into the whole process again. This side is actually easier, because you do not have to remove any cables, just replace the pin on the brake lever. The key difference is that the replacement pivot pin is different and uses a screw to secure the top of the hand guard. The top is a little crowded due to the cable assembly, but I was able to rotate them upward enough to remove the stock pivot pin and insert the replacement pivot pin.
Installing the Brake-side Hand Guard is a little trickier, because both the top and the bottom are slotted, so you have to hold the guard in place while trying to get the screw to go in. It might be a little easier to start the screw first, but you still would have to contend with the washer. Be sure the push the hand guard into place while tightening the screw as the screw will want to squeeze the hand guard out of position. Do not overtighten the screw, and you shouldn't have this problem.
The torque values on these nuts are very low, so it should be enough to tighten them until they are nice and snug. I used my torque wrench on the first two and despite using the recommended values, I think they still may have started to strip before I even got the click. So for the rest of them, I simply got them nice and snug. Fortunately, we're not dealing with engine mounting bolts or anything like that. The pivot pins are screwed in and the nuts are for locking purposes. Even then, they're captured by the hand guards themselves and then locked into place by the nuts securing the hand guards, so I don't think there's any real danger if any of the nuts did strip. The hand guards seem to be attached quite securely, and the levers work as well as before the installation.
The other thing I wanted to do was to raise the windshield from the stock middle position to the top position. The wind seems to be directed towards the top 1/3 of my helmet, resulting in quite a bit of buffeting and noise. Despite that, it's still better than what I got on my Ninja 650R, which was the air blast directed at my shoulders and a lot of noise from under the helmet and from being totally in the air flow.
Tools Used:
Removal is a simple matter of loosening the four screws using a 3mm hex driver and pulling the wind shield free.
After removing the windshield, I removed the four plugs from the top position holes. It took a bit of prying around the edges, but they finally came free.
Next, I removed the well nuts from the stock middle holes and moved them to the top holes. I found that they came out and inserted quite easily using a twisting motion.
All that was left to do was position the windshield over the well nuts and tighten the screws. I finger-tightened them first, centered the windshield, and then tightened the screws until they were snug. I gave the windshield a good push on the sides to make sure it wasn't going to shift positions. And that completes the major modifications to the V-Strom for now.
![]() |
Clutch Cable Adjuster with grooves lined up. Cable housing inserts at the top. |
![]() |
Clutch Cable with new boot. |
![]() |
Clutch-side Replacement Pivot Pin Note the spacer that only goes on this side. |
![]() |
Replacement Pivot Pin installed |
![]() |
Washer, Spacer, and Stock Nut |
![]() |
Re-assembled Bar End Weight Assembly |
![]() |
Top of Clutch-side Hand Guard |
![]() |
Bar End Weight Assembly with Hand Guard |
Installing the right (brake) side hand guard is essentially the same process, so I won't go into the whole process again. This side is actually easier, because you do not have to remove any cables, just replace the pin on the brake lever. The key difference is that the replacement pivot pin is different and uses a screw to secure the top of the hand guard. The top is a little crowded due to the cable assembly, but I was able to rotate them upward enough to remove the stock pivot pin and insert the replacement pivot pin.
![]() |
Brake-side Replacement Pivot Pin Installed |
![]() |
Top of Brake-side Pivot Pin with Threaded Hole for Screw |
![]() |
Screw and Washer Securing Top of Brake-side Hand Guard |
![]() |
Nut and Washer Securing the Bottom |
The other thing I wanted to do was to raise the windshield from the stock middle position to the top position. The wind seems to be directed towards the top 1/3 of my helmet, resulting in quite a bit of buffeting and noise. Despite that, it's still better than what I got on my Ninja 650R, which was the air blast directed at my shoulders and a lot of noise from under the helmet and from being totally in the air flow.
Tools Used:
- 3mm Hex Driver
Time to Install: ~ 10 minutes
Removal is a simple matter of loosening the four screws using a 3mm hex driver and pulling the wind shield free.
![]() |
Windshield Removed |
![]() |
Rubber Plug |
![]() |
Well Nut |
I rolled it out onto the driveway to take a picture in the bright sunshine.
After a couple of rides, I find that I do like the hand guards and new windshield position. I think they even help with the air flow and noise a little, but it's hard to tell for sure since I also raised the windshield after installing the hand guards. The air flow seems to have improved with the raising of the windshield. The noise and buffeting do not seem to be as bad is it was previously, and if I duck my head down a few inches, it all but disappears completely. I may look into installing one of the MRA X-creens with that extra wing to see if that does the same thing. That will be a nice change from what I've been used to.
And with that, the only things left to do are to install the brake light wiring for the Givi Maxia 3 and the RAM Mounts for my POV camera. That will be covered in another posting.
Labels:
2012,
accessories,
DL650,
DL650A,
Glee,
hand guards,
handguards,
OEM,
Oneida Suzuki,
stromtrooper,
stromtrooper.com,
Suzuki,
V-Strom,
Wee,
wind shield,
windshield,
www.oneidasuzuki.com,
www.stromtrooper.com
Subscribe to:
Posts (Atom)